Welcome To The Shakin 'N Bakin Blog!

Welcome to my blog! I love to cook and bake for my family. I hope you enjoy the recipes, foodie reviews, foodie giveaways and cooking tips posted on my blog.

How to Print Recipes: You can print out each individual recipe featured on this blog by clicking the "share" button at the bottom of each post. It will open up to show you options, click on print and another window will open up with the recipe inside it for printing. You can also use the SHARE button to email a copy of the recipe to yourself for printing later.

Showing posts with label Cooking and Serving Tips. Show all posts

Wednesday, January 17, 2018

Five Things You Can Do With Leftover Wine

Wine is for drinking, but for centuries the human love-affair with what the ancients called “the Drink of the Gods” has led to a variety of different uses. That includes everything from cooking with wine to bathing in it as an anti-aging remedy!

Okay, maybe you’re not ready to fill your tub with a fine Merlot or chardonnay, but many wine lovers find they sometimes have leftover wine. Especially if it ends up being a bottle they don't particularly care for. It never has to go to waste. Here are some ideas about what to do with leftover wine.

Five Things You Can Do With Leftover Wine

Cooking’s Worst Kept Secret

Cooking with wine has been a common practice most likely since the first wines fermented thousands of years ago. Adding wine to soups, sauces, gravies and sautées is deep tradition. The number and types of recipes that wine enhances are almost unlimited.

It’s common, for example, to sauté mushrooms in butter and wine, or just wine alone. Another excellent idea is poaching fruits, especially pears and berries, in a delicious white or red. Red wine is well-regarded as an enhancer of the flavor or red meat. Thousands of seafood recipes leverage white wine to bring out the flavor of fish, oysters, lobster and more.

The Versatile Wine Cube

Pouring wine into ice cube trays is not only a way to keep leftover wine for long periods, but you can use frozen "wine cubes" in many ways. You can use them to chill a glass of wine without worrying about watering down your glass with regular ice cubes. They also make instant “flavor cubes” at-the-ready for cooking. Don’t forget to try a “wine slushy.” Put wine cubes in a blender and make a terrific frosty drink.

Leftover Wine

Of course, one of the most obvious uses for leftover wine is to drink it later! The challenge here is to keep wine fresh until you’re ready to use it. This is where wine accessories become your friend. Keeping wine fresh means keeping it away from air.

A search among wine accessory products reveals many devices and methods for maintaining freshness. That includes pumps which can suck air out bottles. That means you’ll also need a good stopper, such as the original or new cork, or a designed stopper accessory.

Handy Wine Tools

Speaking of wine accessories, some must-haves include a wine aerator, a wine-saver pump, a wine chiller, a lovely carafe, a corkscrew and maybe a padded wine bag for transporting bottles. These items are available in an amazing array of technologies, schemes, materials and prices, so make sure to take time to examine selections thoroughly when searching for wine accessories.

Wine As Skin Care?

At the top of the story we floated the idea of a wine bath, but what about applying it right to the skin as a skincare product? Well, the jury is out among experts, but most agree that the best way to use wine as a skin enhancer is to drink it! Flavonoids and other wine components can nourish the skin - and moderation is the key.

Sunday, December 17, 2017

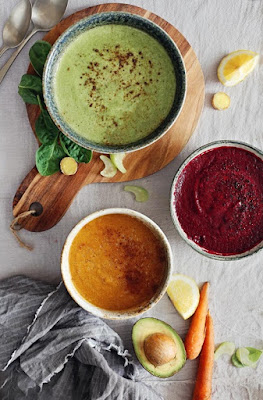
3 Soup Recipes To Help Detox Your Body

Are you toxic? It’s hard not to be in a world filled with pollution along with food toxins such as dyes, fillers, additives and preservatives.

Toxins can adversely affect us from brain to toe, damaging our cells, creating numerous health problems and accelerating aging.

But one good way to rid the body of toxins is with nutrient-charged soups, says Cherie Calbom (www.juiceladycherie.com), a best-selling author and nutritionist whose latest book, Souping is the New Juicing, includes a toxicity quiz.

“Soup can be a part of any detox program,” Calbom says. “What if you never changed the oil or filters in your car? Our bodies are a bit like our cars. They have filter systems that need to be cleaned out and fluids that need to be flushed out. That’s where souping comes in, offering an abundance of antioxidants, phytonutrients, vitamins and minerals.

“Toxins in the brain can cause a host of cognitive and emotional problems. They make us weak, restless, and unable to fight off infections, and can even cause pain in our muscles and joints.”

3 Soup Recipes To Help Detox Your Body

Color Me Green Detox Soup Recipe

5 garlic cloves, minced
1 tbsp. extra-virgin olive oil
1/2 tsp. sea salt
1 cup broccoli, chopped
1-11/2 cups spinach
1 cup kale, chopped
1 can cannellini or great northern beans, drained
2 tsp. fresh turmeric, chopped or 1 tsp. dried turmeric
1/4 cup lemon juice (11/2 lemons, juiced)
1 large bunch of cilantro, chopped
1 tbsp. all-purpose seasoning
1 bouillon cube
3 1/2 cups of water
Sea salt and pepper to taste

On medium heat sauté garlic with olive oil and salt. Add chopped broccoli and stir for five minutes. Stir in spinach until the leaves are wilted, then add the rest of the ingredients. Stir and simmer for 15 minutes on low to medium heat.

Liver-Cleansing Raw Beet Soup Recipe

1 medium raw beet, scrubbed and cut into chunks
1/2 ripe avocado, peeled and cut into chunks
1/4 small onion, finely chopped
2-3 fresh dill sprigs
1/4 cup fresh parsley
1 tsp. raw apple cider
1 tsp. coconut aminos or tamari
1 cup purified water
2-3 Tbsp. lime juice (1 lime)
1/4 tsp. sea salt
Freshly ground black pepper

Blend all ingredients until smooth and enjoy! Serves 1

Watercress Detox Soup Recipe

2 tbsp. coconut oil
2 cups sweet onion, diced
1 cup celery, diced
1 tsp. sea salt to taste
4 medium zucchini, diced (yields about 8 cups)
4 cups vegetable, chicken, or bone broth
1/4 cup unsweetened almond butter, creamy or crunchy
2 cups watercress, chopped
2 tsp. fresh lemon juice (1/3 lemon, juiced)
Freshly ground pepper to taste
1/4 cup parsley, chopped

Sauté the onion and celery with half the salt until translucent, about five minutes. Add zucchini and sauté for three more minutes. Add broth and the other half-teaspoon of salt. Stir in almond butter, bring to boil. Add the watercress and let simmer for five minutes.

Recipes and info are courtesy of Cherie Calbom, MSN (aka The Juice Lady). You can connect with her on Facebook and Twitter and sign up for her free newsletter at www.juiceladycherie.com.

Thursday, September 7, 2017

Tricks And Treats With Halloween Bouquets

Tricks And Treats With Halloween Bouquets
The Halloween season is full of tricks and treats but mostly treats for the majority of people. One way that you can show your love for the holiday while brightening someone's day is to make Halloween cookie bouquets. They are simple and easy to do, and you can use any design of cookie that you want depending on who is getting the bouquet, such as a young child or someone who is older.

If you're making a bouquet for a child, then you want to include cookies that are fun and exciting. Use icing in bright colors and shapes that really depict the holiday. Examples include witches, pumpkins, and ghosts. A bouquet for someone who is older might not require as many details. You also want to keep the cookie designs a bit tame, such as pumpkins, scarecrows and other fall shapes instead of the playful images that the younger generation thinks about with Halloween.

When you make the bouquet, think about what you want the person to feel when seeing the cookies. This will help to determine the colors that you use and the shapes. Find a basket or a vase that you can position the sticks in once the cookies are in place. Decorate the container before adding the cookies so that it has a Halloween theme. You could use stickers, ribbons or flowers along the sides of the container.

Instead of using small sticks, use larger sticks for your cookies so that they will hold up to the weight of the cookies and the icing on them. If you're going to make both large and small cookies, then cut the large sticks in half so that the cookies look like a bouquet when they are arranged. Bake the cookies with the stick in them so that the dough can adhere to the wood. Once your cookies are cooled, you can start decorating them. Use icing that will stay on the cookies, such as a thick icing that you might put on a cupcake. Don't use anything that has a thin consistency as it will slide off. Wrap the cookies in cellophane, and position the cookies in a block of foam that is covered in orange or black paper for Halloween.

Wednesday, October 19, 2016

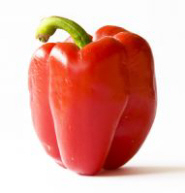
How to Freeze Bell Peppers

This past year my garden did extremely well, especially when it came to growing an abundance of fresh tomatoes, onions, zucchini, cucumbers and bell peppers. Seriously, this was the best crop and harvest we've had in at least the past 10 years.

I had a reader email me to ask how you can freeze bell peppers and after I answered her question, I thought I would also publish the instructions right here on my foodie blog for all of you.

How to Freeze Bell Peppers

Wash and towel dry your peppers. If you have any bad spots on them, you'll want to cut those away or totally toss it. Use a sharp knife to cut away the stem & core. Rinse them underneath cool running water to help loosen the seeds and membranes. Toss them away.

I like to prepare mine on a glass cutting board. I first slice them in half and then I slice them into strips or dice them into chunks, depending on how I plan to use them in the future. Every season, I make batches of both, but more strips than chunks, since we use our strips in a lot of stir-fry's, soups and stews.

Once you have them diced up or cut into strips, place them into a large measuring cup. I like to freeze mine in 2 cup portions, so I measure out 2 cups at a time. Pour them onto a baking sheet in a single layer and use paper towels to blot up any moisture that remains on them. Place the tray into your freezer for one hour to start the freezing process.

Remove from freezer and blog them again with paper towels. Pour into freezer bags (I use quart-size bags) or freezer containers. Purge out all of the air that you can. Seal the bag or container, label them appropriately and then freeze.

When you want to use them, you don't thaw them out at all! You simply remove as many that you need from your package and toss them into whatever it is your preparing. In addition, there is NO NEED to blanch them during the preparation/freezing process either. It's totally not necessary. Furthermore, freezing them does change their texture a little bit, so you don't want to toss them into a salad or eat them plan. They are meant to be used in your cooking, slow-cooker and baking recipes.

Saturday, October 17, 2015

How to Mix Up the Perfect Cocktail Drink

(Pictured: A frozen El Cabo Margarita made with Exotico Reposado Tequila, Fresh Citrus, Triple Sec and Agave)

When it comes to making your bar or restaurant stand out from the rest, many times it involves a signature item - like a cocktail. But if it’s going to have your name on it and be associated with your brand, it has to be perfect. Here is some more on the importance of making your signature drink stand out from Adam Robin, Director of Operations at Cabo Flats.

How to mix up the perfect cocktail - 5 tips on making your signature drink stand out from the rest.

Many restaurants and bars have them - signature drinks.

“It is important to stand out and have unique drinks that are specific to our
concept,” Cabo Flats Director of Operations Adam Robin said.

So besides fitting your cuisine and business brand, what else makes a signature
drink successful? These are Adam’s five secrets to concocting the perfect
cocktail:

1. Balance. Balancing the amount of alcohol with bitter taste to sweet taste. Some believe that more alcohol is better, but the taste has to be considered. Correctly measure the alcohol, mixer, and sweetener.


2. Fresh Juice. Whether its fresh squeezed orange juice, pink grapefruit juice, lemon juice, or lime juice - it is extremely important to use fresh squeezed juice and nothing packaged or pasteurized.


3. Sweetener. Yes, the type matters. Agave needs to be used for tequila, simple syrup needs to be used for vodka or gin. For brown spirits, you should use pure cane sugar.


4. Quality of Alcohol. A low quality vodka, gin, or tequila will ruin your drink every time. You must take into account the distillation process and the item the alcohol is distilled from. For example, good tequila is 100% blue agave. Some of the best vodka, like Titos, is distilled from Corn.


5. Final Touches. The last piece to a "perfect cocktail" is the garnish, the foam, the oil, the bitters, the twist, the smoke, the salted rim, etc. This will have a huge effect on the taste and look of the cocktail. It’s been said people eat and drink with their eyes, so the colors and consistency of a cocktail matters just as much as the taste.

Cabo Flats is dedicated to serving our guests the finest Mexican food and drinks from the freshest local ingredients at a reasonable price. We strive for the highest standards of excellence in the industry and to include prompt, professional and friendly customer service. Cabo Flats wants you to enjoy every experience in a fun, casual and comfortable atmosphere.

Saturday, June 20, 2015

How to Buy Store and Cut a Coconut

When people hear the word "Coconut" they often think of it as being a nut but in actuality, it is a fruit that is grown from the coconut palm tree.

Coconuts are rich in vitamins and minerals like calcium, potassium, magnesium and phosphorus. Typically, a 1 cup serving of shredded coconut is about 283 calories.

Courtesy FreeImages.com 

Here are some tips on how to Buy, Store and Cut a Fresh Coconut

Tips for Buying Coconuts: When buying a fresh coconut you want to inspect it for any external damage and/or mold growth. Once you have inspected it externally, you want to gently shake it to see if you hear any fluids rumbling around internally. Check it's weight...if it's semi-heavy or heavy...it would be a good one to purchase.

Tips for Storing Coconuts: A fresh one can be stored in the refrigerator for 4-8 weeks depending on how ripe it was when you purchased it. Once cut, you can store the pulp or juice (coconut milk) in the refrigerator for up to 5 days or in the freezer for up to 8 months.

How to Open a Coconut: I like to pierce mine and drain the liquid out into a bowl or measuring cup. By draining it first, it will make it easier to cut open. This liquid can be used in various recipes too, so don't throw it away. Place the coconut onto a sturdy cutting board and use a very sharp kitchen knife or butcher knife to slice it in half, following the lines of the seam. Once it is open and in half, you can scoop out the pulp and use it in your various recipes or enjoy it plain.

The pulp of the coconut can be used in a variety of recipes like: beverages, soups, sauces, desserts and more! It is a fruit that is often over-looked here in America and one that American's need to be incorporating into their daily diets on a regular basis.


Tuesday, May 19, 2015

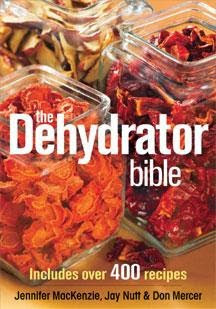
Book Review: The Dehydrator Bible

Whether you grow your own food, buy it locally from farmer's markets or farmstands or even buy it from a supermarket, seasonality still affects its price and abundance. Therefore, it makes sense to preserve food for those times when it's not as plentiful, or not available at all. Drying food is a wonderfully tasty and easy way to do this.

Title: The Dehydrator Bible
Authors: Jennifer MacKenzie, Jay Nutt & Don Mercer
Publisher: Robert Rose
ISBN: 978-0-7788-0213-6

The Dehydrator Bible is a comprehensive food dehydration book with 400 pages containing 400+ recipes and numerous color photos. The recipes cover dehydrating herbs & seasonings, fruits, vegetables, meats and fish.

The easy-to-follow drying instructions and time guidelines will make even a novice cook feel like a seasoned pro. Now that it's gardening season...you will want to plant extra rows of all of your favorite vegetables, fruits and herbs. Come harvest time, you can load them up in your dehydrator and preserve them for future use.

This book will teach you how to dehydrate cucumbers, onions, squash, green beans, cherries, bananas and everything in between. Once you get through all of those sections you will find delicious recipes that call for those types of ingredients. Recipes like: Apricot Almond Muffins,Cranberry Newtons, Banana Nut Oatmeal, Cornbread Johnny Cakes, Campfire Hash Browns, Viking Stew, Chicken & Potato Stew, Bean Fajitas, Pasta Sauce, Mac & Cheese, Cajun Shrimp & Rice, Stove-top Scalloped Potatoes, Raspberry Chocolate Pudding and many, many more!

I have a 7-tray food dehydrator that I've owned for about 5 years now. I know how to do some basic things with it but this book has really expanded my knowledge on what I can do with it. I am also an avid gardener and this book has given me all kinds of ideas on what I should be planting in my garden and what I can do with it when harvesting time comes.

Since receiving, I've read it cover-to-cover and bookmarked numerous pages. I can't wait until late summer when we begin harvesting our fruits and veggies. I will definitely be utilizing The Dehydrator Bible all season long as I dehydrate foods for the upcoming winter season. It's a comprehensive book that is great for the beginner or the experienced foodie.

Disclaimer: Shelly H. has personally reviewed the product listed above. Shelly has not received any monetary compensation for her review. Shelly did receive a free product to try out so she could evaluate and use it for her review. Her thoughts & opinions in this review are unbiased & honest and your opinions may differ.

Friday, May 15, 2015

MagnetStreet Diamond Anniversary Celebration Sale

My daughter is expecting her second child in early September of this year. Right now we are planning a baby shower for early July and then a "Welcome Home Baby" intimate family party a few weeks after he is born. Yes, that's right, she's expecting a baby boy and I am getting my first grandson!

We've got a few special life moments coming up and want to celebrate them in a big way. Instead of shopping local stores for the same old thing that everyone else has...I turn to online shopping for creative and unique things. If you are like me...read on!

MagnetStreet is celebrating their 10 year anniversary with a big sale. MagnetStreet.com is an online, full service stationery store that allows you to create highly personalized magnets, cards and other printed stationery from announcements to invitations and programs to thank you notes.

The MagnetStreet Diamond Anniversary Celebration Sale will save you 30% on Wedding and Life Moments stationery. That's right, you can save 30% by shopping right now! MagnetStreet has grown to be a full service stationer-and an industry leader in design and print capabilities. From Invitations, to Announcements, Thank Yous, Favors...the company now offers an entire line up on specialty papers for the big day and beyond.

After all these years, MagnetStreet maintains a passion for personalization and offers over 80 colors to choose from-or, create custom colors! Any colors. Any design! What I really love is that customers can literally unleash their creativity to carry their style across their products. That's right, customers can get a truly one-of-a-kind and unique look with their creations. Still working out those colors? No problem! Browse the Color Boutique to discover your dream palette, create and share fun custom artwork, plus, get a free custom color palette (for color matching and sharing with vendors)

I was over on the company's web site taking a look at their birth announcements since we will be getting a little grandson in a few short months. All of the designs I've featured in my post are ones that I absolutely fell in-love with. Aren't they cute? Yes, they are!!!

Head on over to MagnetStreet.com and take a look around. I think you are going to love their variety of products and their price points. Don't forget, shop now to take advantage of their Diamond Anniversary Celebration Sale!

Disclosure: This post was created in conjunction with eAccountable.

Monday, April 6, 2015

20 Quick and Simple Kitchen Hacks

Reviving stale cake with a hot water bath? Flipping a fresh pineapple upside down to make it juicier?

Designed to streamline the cooking process and/or get the most out of one’s ingredients, these are but 2 of the following 20 Quick and Simple Kitchen Hacks compiled by the team at Chef Works, the leading supplier of culinary apparel for professional chefs and home cooks alike!

1. Use dental floss to slice cheesecake. The secret to slicing cheesecake perfectly can be found…in your medicine cabinet. Really! Hold the floss taut, as you would to floss your teeth, and gently, with a slight sawing motion, slice through the cake. Clean slices! For best results, use plain (unscented) floss.

2. Spray or oil a measuring cup before measuring sticky ingredients to ensure easy release. Make sure you get all of the honey, molasses, or other sticky ingredient out of your measuring cup by spraying it with non-stick spray before measuring. It will ensure an easy release of sticky ingredients.

3. Store avocado with a sprinkle of lemon juice to keep it from turning brown. It’s as easy as sprinkling lemon juice on top of exposed surfaces of avocado or avocado slices. It will keep them looking green and tasting fresh for far longer.

4. Wrap the top of a bunch of bananas in plastic. Seriously! Wrapping the top of a bunch of bananas with plastic will prolong their life by a few days, and will slow down the browning process.

5. Run a knife under hot water for perfect bars, brownies, or cake slices. Run a knife under hot water, then dry using a kitchen towel or paper towel before slicing. The warmth of the knife will help it glide through the cake easily, for clean slices. Repeat, drying and cleaning off the knife between cuts.

6. Make cookie dough in advance and freeze it. Most cookie dough containing butter can be made in advance and frozen. For drop cookies such as chocolate chip, you can pre-portion dough into circles. For slice and bake cookies, you can form dough into logs then slice and bake as desired.

7. Combine herbs and oil or butter to make your own bouillon cubes. Start by combining butter or olive oil with enough herbs to form a thick paste. Form them into balls or cubes, wrap individually, and freeze or refrigerate. Voila-you have bouillon cubes ready to go when you are.

8. Bring stale cake back to life by placing it in a steam bath. Place a slightly stale cake, either by the slice or whole, above a pan of simmering water. Let it steam for a couple of minutes, not so much as to melt the frosting, but to add moisture to the cake. Serve immediately after doing this.

9. Freeze your broth in individual servings. If you’ve made homemade broth, separate it into common servings such as 1 or 2 cups, store in freezer bags marked with the amount or empty yogurt containers, and freeze. It will keep for months, and you’re ready to roll next time you want to make a soup.

10. Flip natural peanut butter before you open it to help the oil incorporate. If you love the taste of natural peanut butter but don’t care for the messy mixing of the nut butter and separated oil, flip the jar for several hours or overnight. It minimizes the annoyance of stirring to combine, meaning less fuss and mess for you.

11. Soften brown sugar with a slice of apple. Place a slice of apple in an airtight container with hardened brown sugar. Within hours it will soften the sugar. Once softened, use the sugar immediately.

12. Use a plastic bag with the end cut off for easy piping of icing. No piping bags? Not a huge problem. You can use heavy-duty freezer bags instead. Simply fill with frosting, cut the tip of the bag off in whatever size you’d like to pipe, and get to work. It won’t be as fancy as if you have a fancy decorating tip, but it will do the job for simple piping work.

13. Make your own confectioners’ sugar by grinding granulated sugar. You can make your own confectioners’ sugar at home with regular granulated sugar. Simply put granulated sugar in a blender, and blend for up to 30 seconds. It will grind the sugar into a super-fine, confectioners’ sugar consistency.

14. Use a bottle opener to open jars. If you’ve got a tough jar to open, use a bottle opener. Use it to gently pop the seal on top, making it much easier to open.

15. Combine vinegar and milk to make instant buttermilk. If you, like many, don’t use enough buttermilk to warrant buying an entire container, there’s an easy way to make it on command. Add 1 tablespoon of vinegar to a measuring cup and then fill with milk until the mixture totals one cup. Wait until it curdles for an easy DIY solution. Using the same ratio, you can make any quantity.

16. Store lettuce in paper towels. Storing fresh lettuce between paper towels will not only keep lettuce fresher far longer than just keeping it in the bag, but it will remain crisp and won’t get slimy.

17. Microwave citrus fruits for 10 seconds before juicing to release the most juice. Lightly warming citrus will help it soften and release more juice. Microwaving it for 10 seconds will help you get more juice out of each and every lemon, lime, or orange.

18. Store pineapples upside down. Store pineapples upside down for the best flavor: it helps the sweet juice which has sunk to the bottom of the fruit travel back up the fruit, making every single slice juicy and flavorful.

19. Pour hot milk into the “empty” peanut butter or Nutella jar for a tasty drink. Don’t throw out that nearly empty jar! Those hard to reach bits can still be employed to make a delicious beverage. Simply add warm milk, shake or stir, and enjoy.

20. Make your own yogurt by combining a few tablespoons of yogurt with cream or milk. Using the last few tablespoons of a container of yogurt as a “starter” you can combine it with a cup of cream or milk to create more yogurt. Use a bit of that yogurt as a starter for your next batch.

Thursday, March 5, 2015

How to Make Homemade Seasoned Dried Bread Crumbs

Every 6 months or so my mother and I get together and spend 2-3 days making our own homemade seasoned dry bread crumbs. We then pack them into glass mason jars or into plastic storage containers to use throughout the next several months.

When we make these, we have no specific recipe on it but today, I thought I would explain the process and how we do it.

You will need to a food dehydrator with several drying trays to make your own dried bread crumbs via this method, as well as a good blender or food processor. You can use any type of bread or rolls that you would like. We keep big freezer bags in our freezer and save/freeze all leftover breads, hamburger rolls, hot dog rolls, potato rolls, bread crusts, etc. They an be frozen for a few months. When you are ready to make your bread crumbs, thaw them out at room temperature the night before.

Plug your food dehydrator in and set it at the lowest heat seating. Split all of your rolls in half and if you want, cut your slices of bread in half too. This will speed up the drying time. Lay all of your breads and rolls onto the drying trays and place them onto the food dehydrator along with the lid. I like to rotate my trays every 2-3 hours throughout the drying process which takes about 1 1/2 to 2 days if that.

Your breads are done when they are completely dry, hard and crunchy. Break them into smaller pieces and put them in your blender or food processor. Use the PULSE setting to chop them up into find bread crumbs. While they are in there...you will want to drop in your favorite spices & seasonings.

We typically add the following:

1 teaspoon dried parsley
1 teaspoon dried basil
1 teaspoon dried oregano
1/2 teaspoon salt
1/2 teaspoon ground black pepper
1/4 teaspoon garlic salt or garlic powder
1/4 teaspoon red pepper flakes

Use the PULSE function to blend the seasonings into your bread crumb mixture. You are done! Pour the seasoned bread crumbs into glass mason jars or plastic storage containers. One type of container we like to use is those empty plastic peanut butter pretzel nugget containers. We wash them out, dry them and they hold quite a bit of homemade seasoned dried bread crumbs! Make sure you label your containers with the contents and date made. Enjoy!

Friday, February 27, 2015

How to Make Puff Pastry from Scratch + Recipe

Whether you’re looking to cook up a decadent breakfast pastry, crowd-pleasing Piggies in a Blanket, or an Australian Meat Pie, this homemade light, buttery, flakey, layered goodness is worth all five steps.

Courtesy of: Maria Rodale, CEO of Rodale Inc., organic activist, food blogger & mom of three. As Maria says on her blog, “I am not a pastry chef. I’m a hungry woman who is fundamentally lazy, even though I’m crazy enough to make puff pastry from scratch… this recipe may not be perfect, but it will be perfectly delicious.” You can check out the Original Puff Pastry blog post from Maria's blog.


How to Make Puff Pastry from Scratch + Recipe

4 Tablespoons unsalted butter, cubed
2 cups all-purpose flour, chilled (plus a little more for dusting)
1½ teaspoons salt
1½ teaspoons cider vinegar
¾ cup water, chilled
16 Tablespoons unsalted butter, chilled

WARNING: Puff pastry needs at least 24 hours of advance work. Other than that, it’s not too hard.

Part one:

Mix the flour and salt in a bowl and toss in the butter, which should be softened slightly. Mix together gently with your fingers. Add the vinegar to the water; add the vinegar-water to the dough and mix it together. Put it out on the counter (with some flour to dust) and gently knead to make the dough smooth. Flatten the dough into a round flat ball and wrap it in plastic then put it in the fridge for 20 minutes.

Part two:

Take the 16 tablespoons of butter out of the fridge and let it soften a bit. Get out some parchment paper and roll out the butter between the sheets to a half-inch-thick 4-inch square (or so). Get the pastry out and roll it out on a lightly floured surface to make a 4 x 8? rectangle. Put the butter at one end and fold it over to cover it. It’s like you are making/wrapping a butter present!

Part three:

Now the fun begins (the making a book part). Roll the dough out in a long 4 x 18? sheet. Fold both ends in toward the center as if you are making a “gatefold.” (I found that a spatula helps if it gets stuck.) And then fold it again so you have a “book.” Wrap it up in plastic and then put it in the fridge. Wait 30 minutes and then do it again, making sure that the “spine” of the book is always on the left (that’s how you know you are rotating properly). Now go to bed. Or whatever. Wait “24 hours,” give or take.

Part four:

Do this whole rolling, folding, and wrapping thing two more times (waiting 30 minutes between each). Let the dough warm up a tiny bit after you take it out from the long refrigerator rest. Refrigerate for 30 minutes before doing the final rolling and cutting for your pie lids.
Part five:

Roll out for the final time. Be gentle when you cut…don’t want to smoosh all those lovely layers! Make the lid slightly larger than your pie top because it might shrink a bit when you cook it. Use the egg wash (1 raw beaten egg and a bit of water) to glue it together and polish the top.

Saturday, January 31, 2015

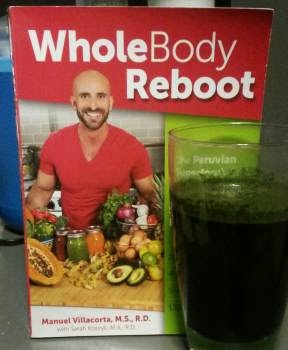
Whole Body Reboot: The Peruvian Superfoods Diet to Detoxify, Energy, and Supercharge Fat Loss

** A complimentary copy was received for review.

Manuel Villacorta’s new book makes bringing Peruvian superfoods easy, delicious, and healthy. Whether your goal is a healthy reboot, weight loss, or an introduction to clean eating, let Whole Body Reboot: The Peruvian Superfoods Diet to Detoxify, Energy, and Supercharge Fat Loss guide you.

I am a trend setter. That’s right, this woman, raised on traditional Southern foods in all their fatty goodness, is a trend setter. I’ve incorporated superfoods into my diet for several years now. No television doctor introduced them to me. And they were a bit cheaper then. Sigh. I love cilantro, avocado, sweet papaya, beans, artichokes, and purple and sweet potatoes. Chia and quinoa came to the party later, but cacao has been on my love list forever. Purple corn? It’s so pretty in summer salads and salsa. While some of this delicious goodness was easy to find and use, things like yacon, yucca, and Pichuberries, Maca, and Inchi Seeds did not hit my radar until recently. And what the heck are Kaniwa, Kiwicha, Camu, Aji, and Lucama? Manuel Villacorta, M.S., R.D. introduced me to them and a batch of fantastic recipes in Whole Body Reboot: The Peruvian Superfoods Diet to Detoxify, Energy, and Supercharge Fat Loss. Whether your goal is a healthy reboot, weight loss, or an introduction to clean eating, make this book your guide.

The 135 recipes in Whole Body Reboot include smoothies, breakfast, sandwiches, curries, salads, soups, stews, snacks, dips, and sweet treats. I dove into the recipes right away because it was snack time when the book arrived. The Chia Cacao Protein Smoothie (page 154) hit the spot. It was sweet, chocolate and banana goodness that tasted like the frosty goodness I used to love from a fast food chain. I’ve had it a few times now and occasionally shared a taste with Hubs and Daughter. Son refused to try it because I used almond milk, but the other family members liked it. I whipped up the delicious Garbanzo Saltado (page 109) to serve as a lunch side dish. It was yummy at the final tasting after preparation and even better the next day after the flavors had more time to blend. The Mu Shu Pork-Peruvian Fusion Lettuce Wraps (page 173) made a nice change from our usual Latin night dishes. The meat-eating family had pork, while the vegetarians had seasoned meat substitute instead. Everyone was happy and enjoyed the nearly utensil-free meal. The addition of quinoa to one of our grab-and-go breakfast options (Quinoa, Spinach, and Egg Muffins; page 79) was a protein-packet hit with everyone. Another big hit was the Breakfast Brain Food Parfait (page 69). It was not limited to breakfast. This treat contains the creamy, sweet, and crunchy goodness that I crave at snack time. The Purple Potato Frittata (page 77) is on the menu for the next Breakfast for Dinner Night.

One thing I truly like about this book is seeing suggested ingredient substitutions on the ingredient list and not at the end of the recipe. I probably liked this little edit more than a normal person would. It makes it easier to whip up a recipe from a stocked pantry when the ingredient swaps are so accessible. If your have a household of eaters with different styles, this book works. There are gluten-free, omnivore, vegetarian, and vegan recipes in the mix. If you’re new to clean eating and want to lose a few pounds, Villacorta includes seven-day menus full of superfood goodness.

If you’re feeling sluggish after a post-holiday splurge or need a jump start, the 5-day Smoothie Detox (Chapter 2) might do the trick. Snacks are included on the detox menu and the Cheat Sheet (page 24) shows you how to fight cravings. Try the Red Reboot for a powerful phyto-chemical punch. If you make it the night before, remember that Chia seeds thicken and you may need to add additional water to reach your desired consistency.

Red Reboot

Red represents energy, strength, power and courage, according to color psychology. Red fruits and vegetables are rich in lycopene and anthocyanins, powerful phyto-chemicals that possess the characteristic red pigment. Lycopene and anthocyanins are linked with:

Ingredients for 1 Serving

1 ½ cups Strawberries, fresh or frozen
½ cup Tomato
½ cup Cooked Beets
1 tablespoon Chia seeds
1 teaspoon Camu Camu powder*
¼ teaspoon Cinnamon
1 cup Coconut water
20-25g protein, Protein powder (rice, pea, or whey)

*Note: Camu Camu is a Peruvian super food that provides therapeutic levels of vitamin C in its natural form. Refer to Appendix C to find where to buy camu camu. If you choose not to purchase camu camu, skip this ingredient. Another great alternative to include a Peruvian super food with Camu Camu is to add a shot of youthH2O.

1. Put all the ingredients in a blender and puree until smooth. Add tap water until it reaches the desired consistency.
Recipe from Whole Body Reboot by Manuel Villacorta / HCI Books/December 2014 - ISBN: 9780757318214

If you want to pump up the daily menu with superfoods, order Whole Body Reboot: The Peruvian Superfoods Diet to Detoxify, Energy, and Supercharge Fat Loss . Pick it up before March 31 and receive an exclusive e-book of recipes and a 25% discount from Villacorta’s online shop.
Villacorta says ‘stop dieting and start living.’ Whole Body Reboot is a step in that direction.

Disclosure: Sherrie Thompson received a complimentary copy of this book for her review. No monetary compensation was received. Sherrie's thoughts, opinions and ideas are 100% her own words and have not been influenced by the sponsor.

Friday, January 30, 2015

Adding Fiber and Omega-3 to Our Diets with Chia Seeds

January 1st, 2015 marked the first day on a new healthy diet journey for my husband and me. Since the first of the year we have cut out a lot of fat, preservatives and other things from our diet that most feel are unhealthy. We've increased our intake of fresh fruits and juices and have been limiting the processed foods.


Recently we've been reading a lot of good things about adding CHIA seeds to your daily diet. If you are unfamiliar with them, they are an excellent source of Omega-3 (promotes heart health) and they are a good source of fiber (not found in fish oil). 

We received a package of the Ch-Ch-Ch-Chia CHIA SEEDS to try out for all of you. They are all nautral, sodium free, gluten free, vegetarian and contain no cholesterol. They are from the makers of the famous Chia Pet and for over 30 years they've been sourcing quality Chia seeds. 

One tablespoon equals 60 calories. I am unfamiliar with using Chia Seeds but did read that you can add them to your oatmeal, cereals, muffins, breads, cakes, cupcakes and all sorts of other things. We decided to add 3 tablespoons of Chia Seeds to my favorite blueberry muffin recipe. I simply mixed them into the batter along with the other dry ingredients called for in the recipe that I used and baked as normal.

Once our muffins were done we enjoyed them with just a tad of natural honey butter melted on the top. OH MY GOSH, they were delicious. The funny thing is that NOT ONE member in my family even noticed that the Chia Seeds were in them! That's right, I was able to sneak in a healthy ingredients and they didn't even notice! I love that! 

The package recommends using 3 tablespoons in your favorite drink or smoothie but I tossed them into my muffin batter and no one was the wiser. I highly recommend you do the same! 

I am going to go out and buy some additional fresh fruits this weekend and try the Chia Seeds out in a good old-fashioned peach & banana smoothie too! YUMMY ~ I can't wait! You can learn more about Chia Seeds by visiting Chia.com

Disclosure: Shelly Hill received a complimentary pair of gloves for her review. No monetary compensation was received. Shelly's thoughts, opinions and ideas are 100% her own words and have not been influenced by the sponsor.

Tuesday, November 25, 2014

Chef Works' 10 Thanksgiving Cooking Hacks

For many home cooks, Thanksgiving dinner is one of the most stressful meals of the year. This year, however, can be different thanks in part to these 10 Thanksgiving Cooking Hacks from the team at Chef Works, the leading supplier of culinary apparel for chefs and home cooks alike.

CHEF WORKS' 10 THANKSGIVING COOKING HACKS

Create a timeline and master grocery list
Cooking a meal for a lot of people can be quite the challenge. To help make the process easier, you can spread out parts of the meal and cook it throughout the days leading up to it. By the time your Thanksgiving guests arrive, you’ll have everything ready sans the extra stress and clean up.

Start by making yourself a cooking timeline and a master grocery list several days before the big day. Not only will this allow you more time to enjoy your family and friends, but it also gives you wiggle room for mistakes and ensures that you won’t be making last minute grocery trips because you forgot an essential ingredient.

Prep ahead of time
One of the biggest challenges on Thanksgiving Day is juggling multiple dishes at the same time. Instead of trying to do everything at once, take a look at your menu and see what can be done ahead of time including:

· Pie dough. Make your dough far ahead of time and freeze it. That way all you have to do is thaw it in the refrigerator overnight and you have homemade piecrusts to impress everyone the next day.

· Turkey stock and gravy. You can easily go to the butcher and get all the turkey extras you need (necks, wings, etc.) to make your homemade stock that you will use for stuffing and side dishes and freeze it weeks in advance. The same goes for gravy, which is usually the most stressful part to make with everyone breathing down your neck anyway. Making gravy ahead of time gives you plenty of time to pay complete attention to the process (we all know that stepping away from constantly stirring the gravy can mean disaster) and give you time to strain it so that you don’t have bits of anything in it. Plus, gravy freezes well, so all you have to do is reheat it Thanksgiving day.

· Casseroles, soups, and roasted vegetables. When creating your menu, consider items that can be done a day or two ahead of time then reheated just prior to the big meal including corn, green bean, and/or sweet potato casseroles; creamy squash or carrot soups; and roasted root vegetables and/or Brussels sprouts. And if refrigerator space is limited, simply store them in an ice filled cooler until they are ready to be reheated.

· Prepping vegetables. Cut down on the prep time Thanksgiving Day by chopping all of your vegetables, peeling all of the potatoes, and sauté the stuffing ingredients ahead of time.

Cook your turkey outdoors
We all know how precious stovetop and oven space is before holiday meals. This year, consider cooking your turkey on the grill (you can find a recipe for a grilled turkey with citrus-herb salt and sage butter here). Not only does this free up a large amount of room in the oven for side dishes and desserts, the smoky flavor from the grill will be a welcomed surprise for all of your guests.

Tape all your recipes to your cabinet doors
Printing out all of your recipes and taping them to your cabinet doors not only gives you a visual of what still need to be done, it’ll save precious minutes as you won’t be searching for recipes online, in cookbooks, and elsewhere. Plus, this makes it easier for others to jump in the kitchen and help.

Adding butter to the dough
Adding cold butter to your pastry or biscuit dough rather than melting it or softening it to make it easier to mix in is what makes the end result deliciously soft and flaky. However, “cutting in” cold butter is the ultimate pain. Instead, use a cheese grater to grate frozen butter into your flour.

Ran out of butter but Have heavy cream?
It’s crunch time and you suddenly realize that you’re out of butter. No need to panic, however, as you can make your own as long as you have a jar, heavy cream and salt. Watch this video to learn how.

Skip peeling the potatoes
One of the most tedious tasks that usually ends up with peels flying all over the kitchen no matter how careful you are, peeling the Thanksgiving potatoes is not necessary. Boil your potatoes with the peels on, then once they’re cooked, “shock” them by dunking them in ice-cold water and the peels will slide right off when you rub your hands over them.

Get fluffier mashed potatoes
Simply add a little bit of baking powder while you’re mashing the potatoes (one teaspoon per 6 potatoes is fine). The heat from the potatoes triggers the chemical activity in the baking powder for instant fluff. Then, doctor them up with butter, sour cream, and herbs as you please.

Have your emergency contacts ready
Okay so Thanksgiving is rarely an absolute disaster, but there are definitely moments of panic and second-guessing throughout the day. Have this list of holiday hotlines on hand if you need a quick answer about your Thanksgiving dinner preparations. From turkey preparations to how to store and what to do with leftovers, these hotlines can help you out in a pinch (especially if you’re the stubborn kind who doesn’t like to ask family for help).

Don’t forget about your slow cooker
Your oven will be getting a workout and you might be panicking about getting all your dishes heated in time for dinner. Slow cookers are an excellent and out-of-the-way cooking option for veggies, mashed potatoes, or cranberries. There are plenty of Thanksgiving recipes for slow cooker casseroles, so don’t let this space-saver go to waste!

Thursday, August 14, 2014

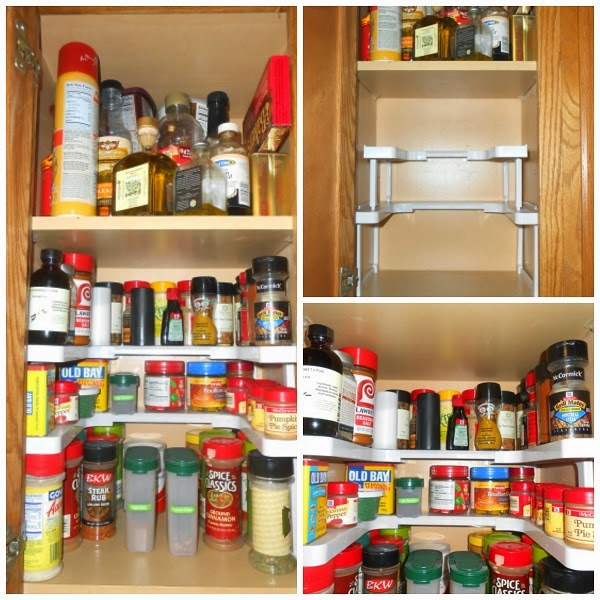
Kitchen Cabinet Organization Thanks to Spicy Shelf

Spicy Shelf Turns That Unruly Mess of Spices Into a Home Chef’s Organized Dream - Spicy Shelf Nearly Doubles Usable Storage Space While Making Every Spice Easily Visible!

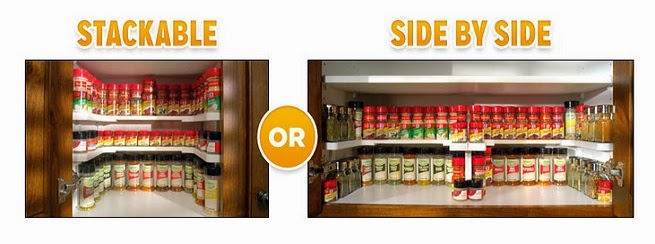
Anyone who’s spent time searching for that one needed spice - knowing it’s there but unable to find it among the clutter of tins and bottles - will want Spicy Shelf™, the new solution that nearly doubles usable storage space while also making every spice in the cabinet easily visible. Guaranteed to fit any size cupboard or pantry, there’s no complicated installation - simply use existing shelf pins or the included freestanding legs.
The Spicy Shelf can be used for organizing your spices in the kitchen, craft supplies in the craft room, beauty supplies in the bathroom and think about using it in the garage too! It can be used any where that you need to get things cleaned up and organized!

The Spicy Shelf arrives to you unassembled but don't let that scare you. I was able to get it assembled and into my kitchen cabinet in less that 12 minutes. Trust me, I am NOT what you would call a handyman at all. If I can do it, you can do it too!

Inside the package is an instruction sheet with various diagrams. You look them over and decide which configuration is best for your particular needs. I selected the "both tall" configuration since my spice bottles tend to be on the large side.
Once I had it in the cabinet I went through all of my spices and neatly organized them on the Spicy Shelf. I love that I can now see everything that I have quickly and I no longer have to move things around or dig through my cabinet to find what I need. LOVE IT!!!

Just check out my BEFORE and AFTER photos. They really tell the entire store here! Plus, when the unit gets dirty, all I need to do is wipe it down with a little soap and water. Easy care! Now I can find things quickly & easily...plus...when others are over to our home, they won't see a disorganized mess ever again!

Right now Spicy Shelf has a fantastic deal going on. Buy 1 set and get a second set for FREE! That's right, get 4 of them for ONLY $19.95 plus shipping & handling. These are the same ones that you see all over TV. Just imagine all of the places around your home that need organized and Spicy Shelf can definitely help with that. They make a great gift too!

Thank you Spicy Shelf for providing a set to me for a review here on the Shakin 'N Bakin Foodie Blog. We love them and recommend them to all of you!

Disclaimer: Shelly Hill has personally reviewed the product listed above. Shelly has not received any monetary compensation for her review. Shelly did receive a free product to try out so she could evaluate and use it for her review. Her thoughts & opinions in this review are unbiased & honest and your opinions may differ. The Shakin N Bakin Blog is not responsible for delivery/shipping of giveaway items won from this blog nor are we responsible for mis-use or injury caused by items won from this Blog. Content on this blog is copyrighted, all rights reserved. We reserve the right to legally pursue anyone who violates our rights and/or steals our copyrighted material.

Wednesday, April 23, 2014

4 Common Caster Types

Casters are small wheels designed to make large objects easier to move. Their numerous applications include shopping carts, office chairs and tables, and material handling equipment. Heavy duty casters are common on platform trucks, assemblies, and tow lines. Casters work best on smooth, flat surfaces.

Casters come in several different sizes and materials. They are usually made of aluminum, nylon, plastic, rubber or stainless steel. Some are attached to roll along a straight path, while others pivot to align themselves to the direction of travel. Casters come in four basic types: rigid, swivel, braking and locking casters.

Rigid Casters

Rigid casters represent the most basic caster type. They are mounted to a stationary fork that is fixed based on an object’s orientation and travel direction. In North America, the rear wheels of a shopping cart are usually rigid casters. They restrict the cart’s motion so it travels along a straight line.

Swivel Casters

Like rigid casters, swivel casters are also mounted to a fork that is fixed to an object. However, a swivel joint allows the fork to rotate 360 degrees. This makes the object easy to move in any direction without a change in orientation.

Swivel casters usually have a small amount of distance between the center axis of both the vertical shaft and the caster wheel. If the wheel does not face the right direction, the offset causes the wheel to rotate until it faces the right direction of movement. Without the offset, the wheel could drag across the floor or prevent motion.

Braking Casters

Even inexpensive casters often include a braking feature. A braking caster prevents a wheel from turning. It accomplishes this with a simple brake cam that presses against the wheel. Even in this position, the wheel may continue to swivel in a small circle around the offset distance.

Locking Casters

More complex casters include a rotational lock so neither the shaft or wheel can rotate or turn. Sometimes called a total lock caster, this type of caster provides rigid support. Some caster systems have a central lock mechanism that enables all casters to brake and lock at the same time.

Access Casters Inc. is an example of a North American company that sells rigid, swivel, braking and locking casters. Companies like this one sell casters that are suitable for schools, libraries, offices, hospitals, furniture stores and the food service industry. Many of the world’s top brands are available through these companies.

Thursday, February 27, 2014

4 Tips on Adding Spicy Heat and Peppers to Your Dinner Salads

If you are tired of the same old, same old dinner salad...now is the time to add some flavorful heat and kick it up a notch with some flavorful peppers. You can toss in fresh peppers, sprinkle on hot sauces or spice it up a bit with some flavorful croutons.

Here are some of our favorite ways to add some spicy kick to our dinner salads.

* To add some heat and much added flavor to your favorite salad dressings, try adding a few drops of your favorite hot sauce or pepper extract to your dressing. Measure out an 1/8 cup of the dressing and then add in your additional ingredients. Pour dressing immediately over your vegetable salad.

* You can add all kinds of fresh peppers to your salad! When people think of adding peppers to their favorite greens they often think of just adding the red or green bell pepper. However, you can add jalapenos, chili peppers, banana peppers, cherry peppers or sweet cubanelle peppers all make great additions and are nutritious too!

* If you like a little crunch consider adding some spicy homemade or store bought croutons to your favorite salad. You can find croutons in the store that come in a wide variety of flavors, including spicy ones like cracked black pepper to add some heat!

* Got leftover spicy chicken from the night before? Chop it up and toss it in your salad! You can use breaded chicken, skinless chicken or chop up some leftover hot wings and toss them in!

Wednesday, October 9, 2013

Benefits of Having Extra Commercial Cooking Equipment Parts on Hand

If you are running a food business, you have to be able to offer as many different dishes as possible. While having the ability to serve sandwiches is nice, your customers may want a steak, barbecue chicken or a juicy burger instead. You have to be able to make hot meals that can be served in a reasonable amount of time.

To speed up the cooking process, you can use machines that will deep fry french fries and onion rings in a matter of seconds. Dozens of burgers can be put on a large frying pan and made at the same time to serve your hungry customers in a matter of minutes. After all, when you are hungry you want your food NOW!

Having a lot of commercial cooking equipment parts on hand helps if any of your machines breaks down. It isn't professional or an example of good customer service to tell a patron that he or she cannot have the special steak or that a child cannot have macaroni and cheese because something has broken down.

Repairs will have to be made at some point on all of your machines. It is easier to have the parts on hand to make the repairs instead of having to order them after your machine has broken. Time is money and you are losing money if you have to wait to order parts and to receive them.

It makes practical business sense to always have extra parts on hand. When a breakdown occurs you will be able to fix your machines in a matter of minutes or hours...as compared to waiting for weeks.

Friday, July 26, 2013

How to Freeze Cherry Tomatoes for Later Use

Every year we get an abundance of small red cherry tomatoes...more than we can possibly eat and last year I started freezing them and canning them for use during the late Fall and Winter months. Many people think that you can't freeze tomatoes and that is simply untrue!

Here is how I freeze my cherry tomatoes.

Wash and air dry your cherry tomatoes, making sure to remove any stems and tossing out any damaged tomatoes. Once they have been completely dried...lay them in a single layer on a baking sheet or cookie sheet. Place them into the freezer and freeze for several hours. Freezing them like this first will help them to not stick together later.

Once they are frozen solid (takes 3 to 5 hours) remove the tray from the freezer and place your cherry tomatoes in a freezer bag or freezer-safe plastic container. Make sure you label them properly before placing them back into the freezer.

We keep ours for up to 5 or 6 months frozen. When we need them, we partially thaw them and then use in various recipes...like homemade tomato soup, tomato juice, salsa recipes, barbecue sauce recipes, toss into vegetable soup or even into your favorite chili during the cooking process.

We do NOT toss ours onto salads as they come out a little too mushy from the freezing process, so we only use ours in recipes that need cooked tomatoes (soups, stews, sauces and juices). Enjoy!

Sunday, May 5, 2013

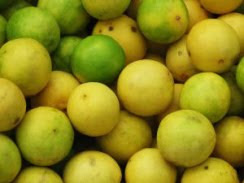
6 Great Tips When Using Fresh Lemons and Limes


I love to visit our local Farmer's Market during the summertime and purchase big crates full of fresh lemons and limes. Citrus fruit is healthy for you and makes for a great recipe ingredient in many of the items you cook, grill and bake...everyday!

Here are 6 Great Tips When Using Fresh Lemons and Limes in your recipes.

* Lemon and lime zest and juice can be used interchangeably in the majority of recipes that call for that ingredient.

* Roll your lemons and limes on a cutting board or countertop a few times to before slicing. This will help you get the most juice out of the fruit. This tip is used when the recipe calls for fresh lemon or lime juice and for when you are squeezing your fruits to obtain the juice.

* When juicing fresh lemons and limes, you want to juice them at room temperature which yields more fresh juice than refrigerated fruits.

* Once your fruit has been sliced, you will want to store your fruit in the refrigerator. You can store fresh lemon and lime juice in a container in your refrigerator for up to one week.

* When shopping for citrus fruits, look for unblemished fruits with beautiful looking skins. It is best to "pass up" any damaged fruits sitting at the Farmer's Market or Grocery Store.

* Do not store fruits in a bag or sitting in a bowl on top of one another. The weight from the other fruits can bruise or damage the fruits underneath them. Avoid storing them in extreme heat, moisture or in direct sunlight once they have been picked from a tree.

When it comes to using fresh lemons and limes, what are some of your favorite tips? Got any to share with us? If so, leave them in my comment form below! Thanks!